Friday, October 28, 2016

Animator app

Just a quick post. This is what happens when you let your 10 year old play with your phone. On a side note I don't think he did that bad! Check out this original animation by my little one.

Animation made on Animator app for Android.


I hope everyone has a safe and Happy Halloween! Remember to follow me for more.


Thursday, October 27, 2016

Halloween Bookmarks

With Halloween coming up, of course, that means Halloween parties as well. This year my son asked me if I would make his classmates a Halloween themed bookmark. There are 24 children in his class.. That means 24 bookmarks. And I did them all in two days. (Go me!) I've been making corner bookmarks for several years. I was taught by an art teacher when I was in school. The hardest part is cutting out the pieces. I used construction paper for everything.
First start by drawing a 3x3 square on your paper. Then a 3x3 square above that one with one side attached to the first. Also make a 3x3 square to the right of your first square.
Then draw a diagonal line in the second and third squares from corner to corner. The outermost triangles will be cut off and you will have the shape pictured below.
The corner of the shape gets folded down on both sides. Glue the top flap to the bottom flap. Be sure not to glue the bottom flap to the other side of the square. You should be able to lift that part up so it will fit over your book page. Your folded shape should be square now, like this. I also glued a background on to give it some character. How you decorate is up to you. Let your creativity flow!
Eyes and teeth are last for my little monsters. The eyes were simple with white paper cut into a circle. I used the cap from a glue stick to make my big circles and a hole punch for my small ones.

These are my finished monsters.  I think all the kids will enjoy keeping these in the books they read.


 This project is so much fun and completely customizable to almost any character, animal, anything you can imagine. I hope everyone tries out this project! Please post pictures so I can everyone's creations. And as always follow me for more.


Friday, October 21, 2016

Disney Cutouts (Cheap)

Quick post on my latest mini project. I've been letting my youngest pick out a box of Fruit Snacks on our weekly shopping trip. So far she picked out a box with Zootopia Characters and a box with Frozen Characters. She loved the pictures printed on the front so much she wanted to keep the box. So I decided to cut the characters out for her. We stuck them on her wall so she can see them everyday.

She loves having her favorite characters on her wall and its pretty cheap to! Really it's perfect for all ages everyone needs a little Disney in their life! As always follow me for more.

Saturday, October 8, 2016

We Made Rainbow Paper!

I spent most of my morning scouring the internet for something interesting to do with my two munchkins. I found this really cool experiment over at The Science Kiddo. Click the link to see her post. She makes tons of fun projects you HAVE to check it out.
So first I wanna say a big thank you to her for posting this awesome experiment. I had so much fun with my kids making this super shiny paper craft. All you need is clear nail polish, a bowl of warm water. and black paper. I used construction paper but I think she used cardstock either works fine. Then we decided to try white construction paper to see if  that would work as well.
We tried dropping the nail polish in first then the paper. We found its easier to put the paper under the water then drop in the polish and quickly pull the paper out and lay on a towel to dry. Our black paper came out really cool and colorful and bright. The white still had color however it was more pastel and a bit harder to see. Still the results were cool and we had a lot of fun trying this out.


 These are the ones we did I think our water was a bit colder than it should have been because our polish kept drying very quickly leaving the blank spots behind but over all it turned out really well. And we are definitely going to try this again! Again go check out The Science Kiddo! Thanks for stopping by and remember to hit the follow button for more!


Thursday, October 6, 2016

Open When Letters

Hey everyone so I had another birthday come up and I decided to make some open when letters. I have seen alot of post on these and the concept is fantastic! Getting right into it I made 15 letters including the Open Now letter with instructions.

These are the letters I did:
  • You need to smile
  • You need a kiss
  • You need a hug
  • You miss me
  • You need to talk to God
  • You are stressed
  • Your having a bad day
  • You need to write
  • You need a reminder
  • You get a craving for something sweet
  • Your wondering about the future
  • You can't sleep
  • You are board
  • You need to know how much I love you


I used plain envelopes and decorated them with markers and colored pencils. In each envelope is a letter from me about the topic in the envelope and most have extra things as well. For example in the open when you need a kiss I put in a bunch of Hershey kisses. In the open when you need to write I made a tiny notebook and in the craving something sweet chocolate of course! Here are some close ups.

These Letters were a lot of fun to make even though they did take several hours to complete! My friend loved them and had a great birthday! Planning on making more for Christmas! Thanks for stopping by and as always like my Blog for more!!!


Tuesday, September 13, 2016

The Endless Card

Hey guys, it's Happy Birthday time over here! So I'm making an awesome birthday card! This is the endless card I've seen around Pintrest. It's a pretty simple card to make and can be as elaborate or simple as you'd like. I think this is the perfect card for any occasion and the materials are very simple. In fact I used just one sheet of 12x12 scrapbooking paper plus my decorations. Jumping right in I squared my paper into 4x4 squares. Cut 9 but I only ended up needing 4.


Putting it together was pretty simple. I cut each square in half and laid two halves side by side. Two more halves go on top of that in the other direction. Only glue the corners together. I lined them up after I took the picture. I just wanted to show how they should be positioned.

Fold the front back like shown and glue two more the corners and the center.

Now fold one last time and glue the corners and center. This way all of the plain side should be covered by the printed side. I pressed everything together and let it dry over night. My decorations were simple on the front I put a happy birthday tag and heart. Folding the card back my son wrote his happy birthday. Folding again was my daughters and the last fold was my happy birthday message.


I hope everyone enjoyed this tutorial and if you try it please post pictures so I can see what everyone comes up with. And as always follow me for more!

Friday, August 26, 2016

Weekend Mani!

Hey everyone it's Friday! Every other weekend or so I do up my nails for the upcoming week. Some days I do my design directly onto my nails and other times I paint false nails and glue them on when they are dry, Today I want to share a quick and easy tutorial I'm doing for this weeks:
WEEKEND MANI!

To start with I use a base coat if I'm using my real nails. I'm using L.A. Colors Base/Top Coat. Using a good base coat is super important because it protects your nails and prevents staining.
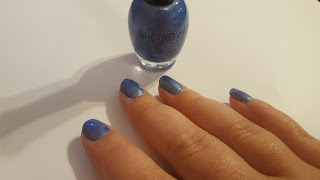
Next I paint two coats of Broadway Nails O! Jessica #8

Before it is finished drying I put a clear coat over both ring fingers only. Working quickly I put my diamonds in place. Diamonds are from Sassy+Chic 3N1 Nail Art Pen. I just use a cuticle stick with a bit of clear polish on the end to pick them up and place them on my nail. After all the diamonds are in place I put a top coat over the nail.


While my ring finger nails are drying I sponge Broadway Nails Paradise Water #45 glitter onto my remaining nails. Then I use my nail clippers to cut the edges of the diamonds off the end of my nails.   After everything is even with my nail I put a top coat over all of my nails and let dry.


I hope you all like my simple weekend nail and don't forget to follow me for more!